RasPi 6: Guitar Pedal Effected by Raspberry Pi Pico (Hardware Prototype - Chassis)
Last Updated on November 16, 2021
First Published on September 21, 2021
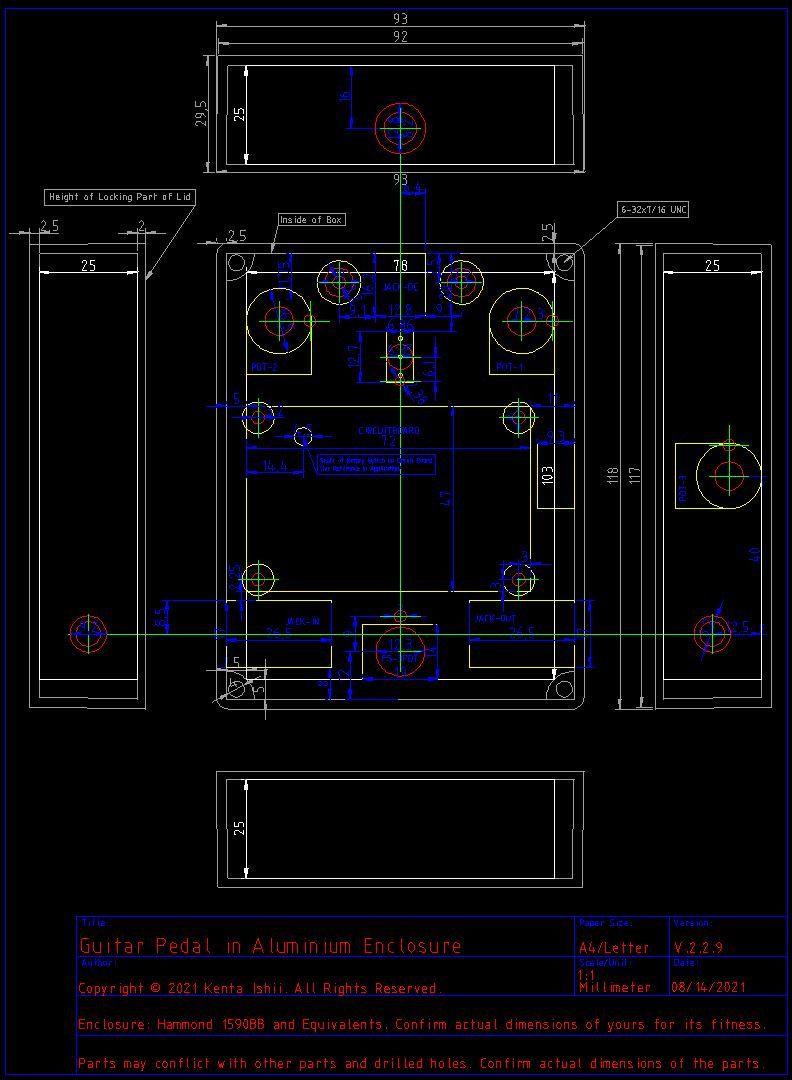
To make the chassis for my guitar pedal, I made a plot by LibreCAD, an open source 2D CAD. I needed to place 3 POTs, an ON-OFF-ON toggle switch, a 72mm * 47mm universal board, a push switch (stump), etc. The interface of my guitar pedal are just analogue because ADCs of Raspberry Pi Pico can be run simultaneously.
Download my drilling plot (pedal_pico_enclosure.dxf): Use like drilling a box for the chassis of my DIY premap. However, views of this plot are just from outside, i.e., an exterior elevation without a lid, but not an interior elevation like in the plot for the chassis of my DIY preamp. I used another clamp to hold the box to a working table. Two clamps give me stable holding in a vertical way by clamping the interior of box's side and a working table. Note that dimensions of POTs are 7.2mm for shaft holes, and 3.0mm for locking holes (dimensions in POT1 are difficult to distinguish).
* (Updated on 11/16/2021) Download my modified drilling plot (pedal_pico_enclosure_rev.dxf): (1) Cleaned up dimensions. (2) Made 0.5mm margin between POT-3 and the bottom of the enclosure. (3) Corrected an error of a vertical dimension for the shaft of the rotary switch (only for your reference). This modified plot hasn't been used for an actual work.
Steps of Work:
i. 1.0mm-2.5mm Pin Vices (No Through, Just Guides).
ii. 2.5-4.5mm hand drills (Bits: 2.5mm, 3.0mm, 3.5mm, 4.5mm). Stopped at 2.5mm for Hole Locking 3-Way SWT, and 3.0mm for Holes Locking POTs.
iii. Taper Reamer. Making a hole for FSWT is OK by my 12mm taper reamer.
iv. Test Fitness with Actual Parts.
a. Widen a hole for POT3 if the fitness is wrong.
b. Take care of a hole for LED. It tends to be wider in using a reamer.
c. Slightly widen holes to hold a universal board with screws, nuts, and washers. Errors on drilling make wrong fitness for a universal board.
v. Watery Sanding by #1000 Water Proof.
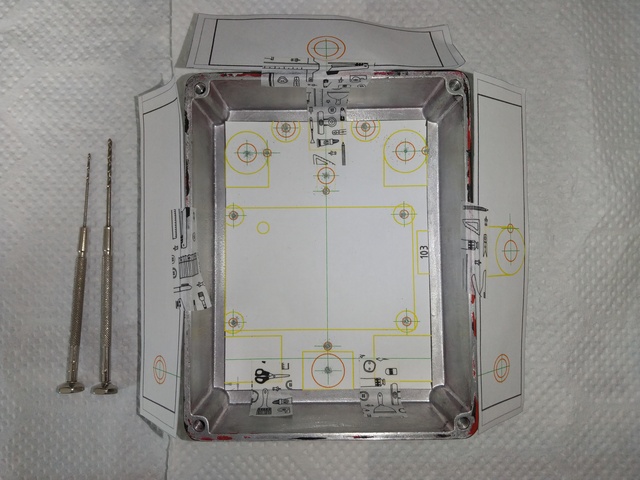
I used a painter's tape which can be removed easily. Caution that the height of this box is lower than the plot, so that the side POT can't be fit because of the hole was slightly close to the box's edge. I needed to widen holes approx. 1mm to fit with the POT3.

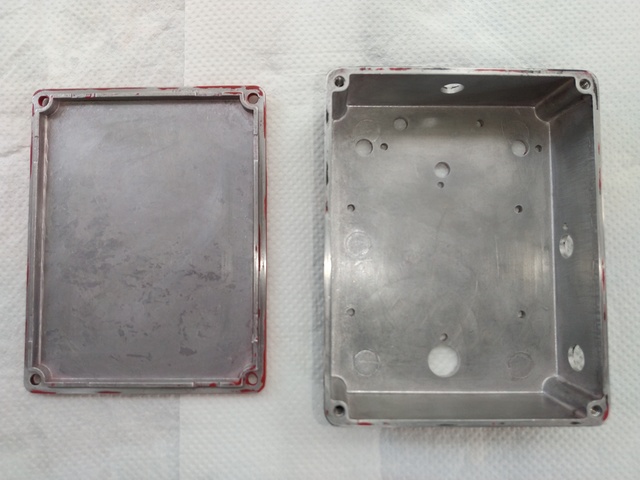
Drilled Box after waxing its exterior surface. I used Vaseline, but spindle oil may also be good.